Tutorial: Create a FastHTML app that runs on AWS Lambda
If you know Python, and don't want to learn JavaScript, FastHTML might be for you.
FastHTML is a lightweight Python web framework that is designed to help you create web applications in pure Python. It builds upon the principles of htmx, bridging the gap between backend simplicity and frontend interactivity.

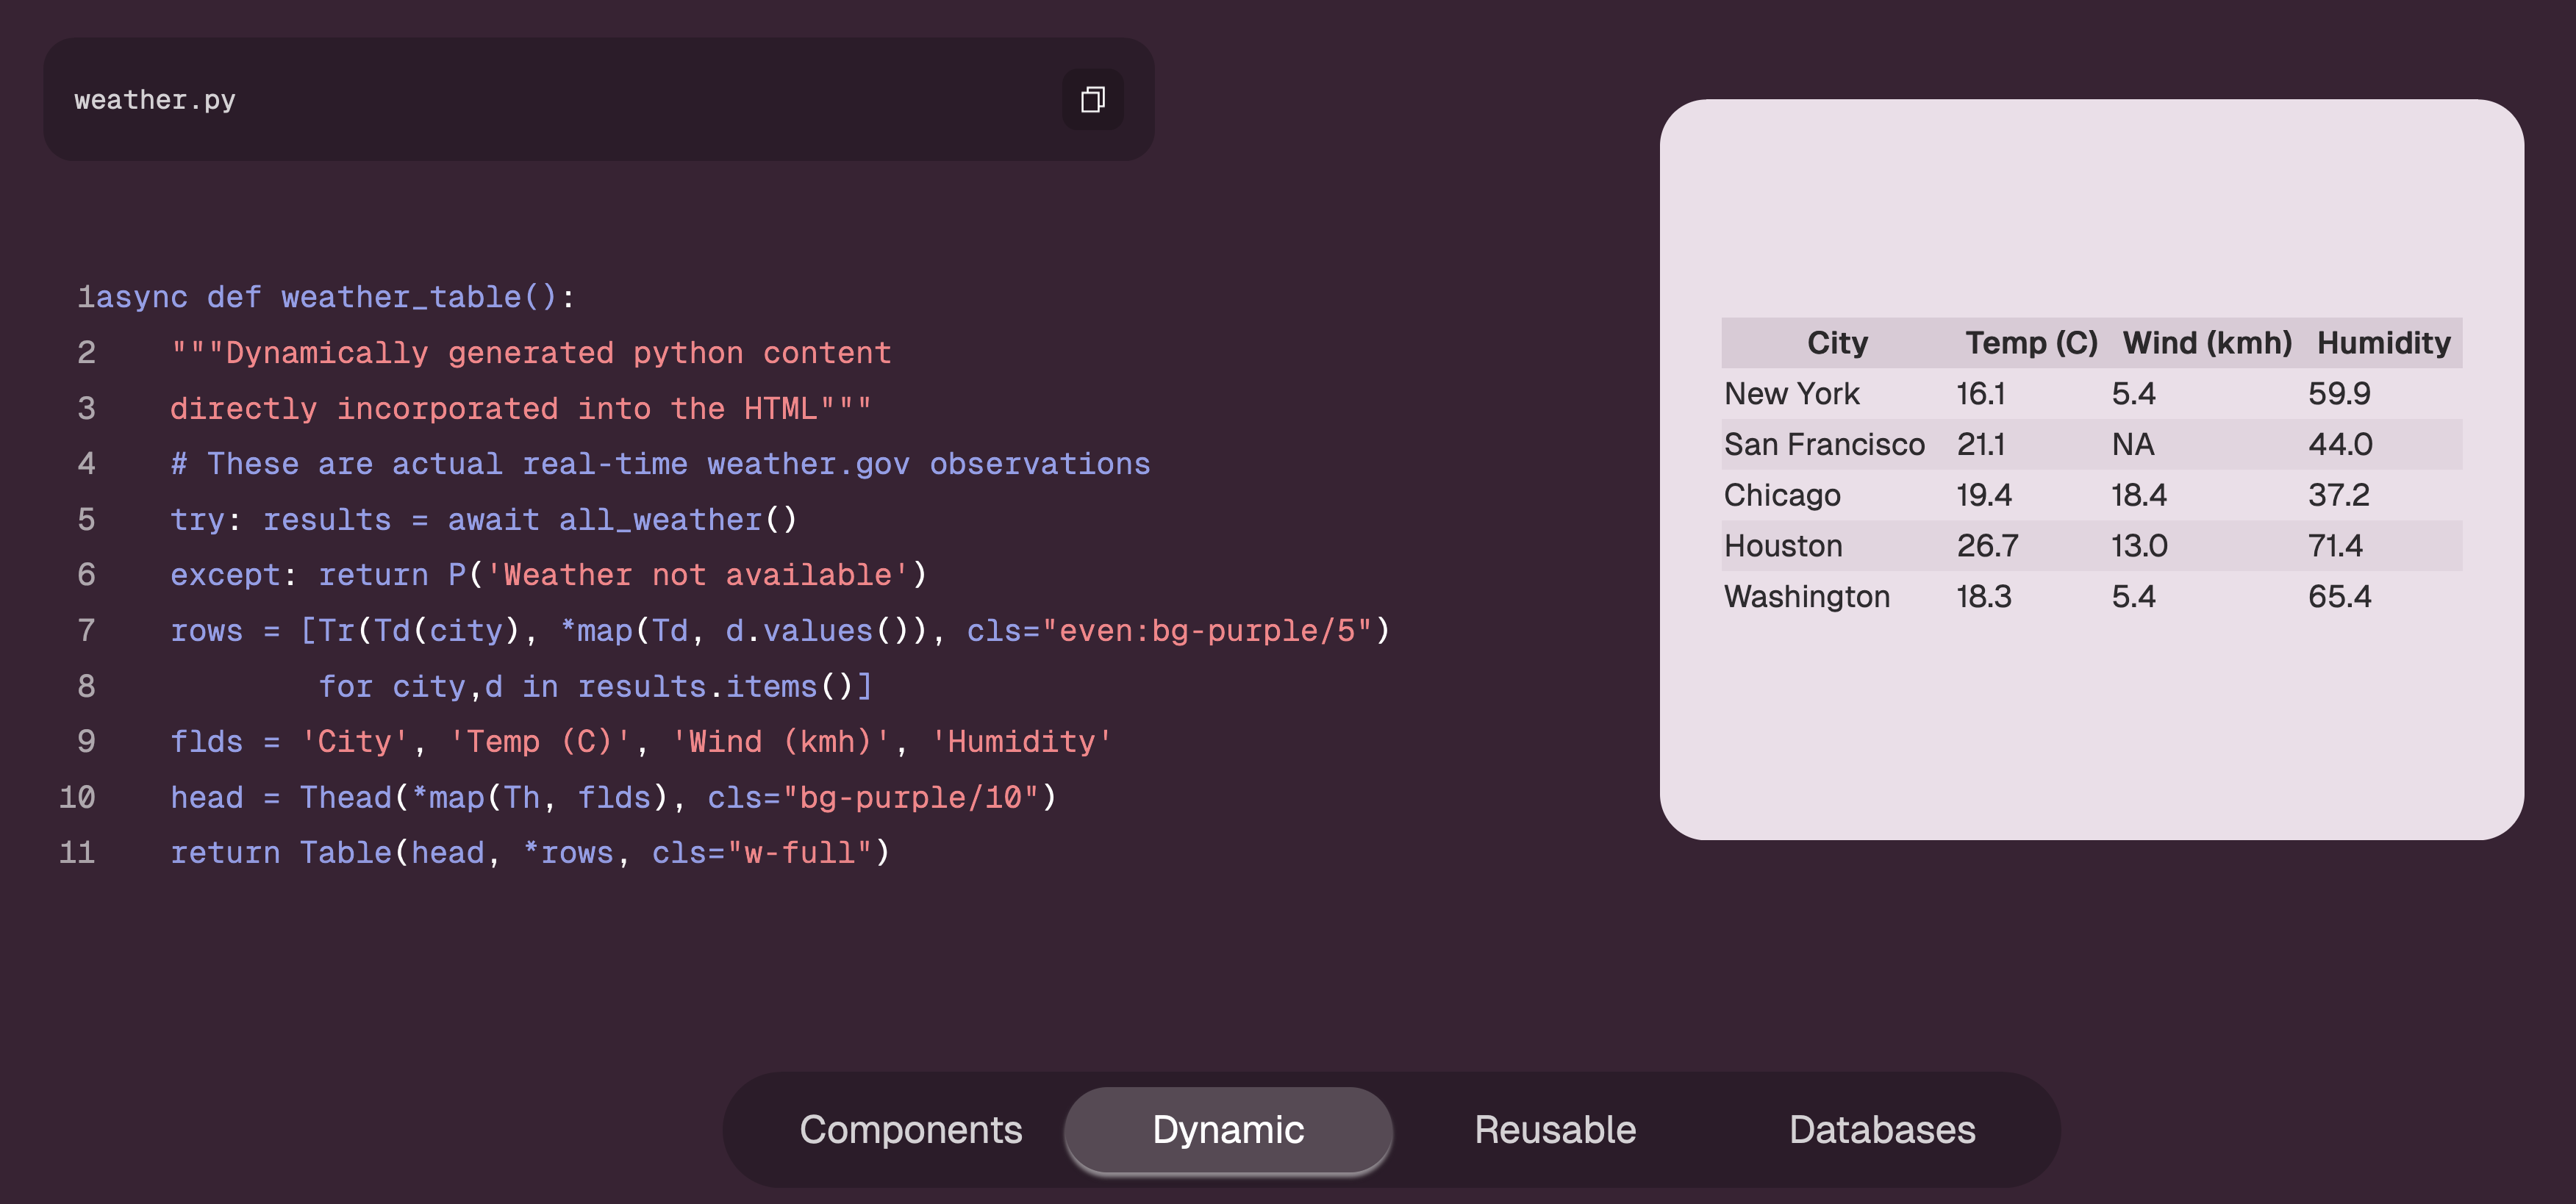
This example cribbed from the FastHTML homepage shows a table implemented fully in Python.
FastHTML maps various HTML elements to their equivalent component forms in Python, allowing you describe your application in Python. And then using the magic of htmx, it converts these into HTML and CSS that gets sent to the browser. For the pedants in the room, yes, at the end of the day, there's Javascript involved, but that comes from the htmx library, and you don't have to worry about or interact with it. And fear not, if you want to bring in JavaScript at some point, you can.
So what does a minimal FastHTML app look like? After running pip install python-fasthtml, all you need is:
# src/main.py

from fasthtml.common import *

app, rt = fast_app()

@rt("/")
def get():
    return Titled("FastHTML", P("Let's do this!"))

serve()
Let's put this on AWS Lambda
We'll use a slightly modified version to account for some lambda idiosyncracies, namely,
that you can't write to any other location than /tmp and FastHTML will try to create a
.sesskey file where its launched if we don't pass it a secret key.
from fasthtml import common as fh
import os
import secrets

secret = os.getenv('SESSION_SECRET') or secrets.token_bytes(20)

app,rt = fh.fast_app(
    live=os.getenv('LIVE', False),
    secret_key = secret)

@rt('/')
def get():
    return fh.Div(fh.P('Hello from FastHTML on AWS Lambda!'))


fh.serve()
We'll build the infrastructure for this using Terraform, specifically the AWS Lambda module from serverless.tf. We'll also leverage AWS Lambda Web Adapter to make our local development story smooth and purely Docker based. This lets us migrate to ECS, EKS or even off AWS if we need to play the startup cloud credit arbitrage game.
The Dockerfile
#./Dockerfile

FROM public.ecr.aws/docker/library/python:3.10-bookworm
COPY --from=public.ecr.aws/awsguru/aws-lambda-adapter:0.8.4 /lambda-adapter /opt/extensions/lambda-adapter
ENV PORT=8000
WORKDIR /var/task
COPY requirements.txt ./
COPY favicon.ico ./
RUN apt-get update && \
    apt-get install -y build-essential gcc && \
    python -m pip install --upgrade pip setuptools && \
    python -m pip install -r requirements.txt

COPY src/ ./src
EXPOSE 8000
CMD ["python", "src/main.py"]
We use the AWS Lambda Web Adapter to run the FastHTML app on Lambda without modifying the code for Lambda. Normally, a Python Lambda function requires a Lambda function handler as an entry point, but with the Web Adapter, you can build your project as usual.
When you add the Lambda Web Adapter extension to your Dockerfile, it listens for incoming events, translates them, and routes them to your FastHTML HTTP server. This lets you code normally while gaining flexibility. For example, you could choose to dynamically switch between AWS Lambda and Fargate using tools like Lambda Flex. Or you could migrate to any service that can run containers when its right for your workload.
Setup ECR repository where the lambda docker image will live
# ./infra/main.tf
resource "random_pet" "this" {
  length = 2
}

module "ecr" {
  source = "terraform-aws-modules/ecr/aws"

  repository_name         = "${random_pet.this.id}-ecr"
  repository_force_delete = true

  create_lifecycle_policy = false

  repository_lambda_read_access_arns = [module.lambda_function_with_docker_build_from_ecr.lambda_function_arn]
}
We used random here because I didn't particularly care about naming this, but you don't have to. You can name it something that makes sense for the project you're working on. Notice how we use repository_lambda_read_access_arns to ensure the lambda can pull the image during setup.
The local docker build using Terraform
# ./infra/main.tf
locals {
  source_path   = "../"
  path_include  = ["**"]
  path_exclude  = ["**/__pycache__/**"]
  files_include = setunion([for f in local.path_include : fileset(local.source_path, f)]...)
  files_exclude = setunion([for f in local.path_exclude : fileset(local.source_path, f)]...)
  files         = sort(setsubtract(local.files_include, local.files_exclude))

  dir_sha = sha1(join("", [for f in local.files : filesha1("${local.source_path}/${f}")]))
}

module "docker_build_from_ecr" {
  source = "terraform-aws-modules/lambda/aws//modules/docker-build"

  ecr_repo = module.ecr.repository_name


  use_image_tag = true
  image_tag   = local.dir_sha

  source_path = local.source_path # "../"
  platform    = "linux/amd64"
  build_args = {
    FOO = "bar"
  }

  triggers = {
    dir_sha = local.dir_sha
  }

}
The key thing here is to enable use_image_tag and set the image_tag to the sha of the changed files.
The lambda function infra definition
# ./infra/main.tf
resource "random_password" "session_secret" {
  length  = 20
  special = false
}
module "lambda_function_with_docker_build_from_ecr" {
  source = "terraform-aws-modules/lambda/aws"

  function_name = "${random_pet.this.id}-lambda-with-docker-build-from-ecr"
  description   = "My FastHTML lambda function"

  create_package = false # This would be true if you wanted to use Zip Package
  package_type  = "Image"
  architectures = ["x86_64"]

  image_uri = module.docker_build_from_ecr.image_uri
  create_lambda_function_url = true # Use with caution. See note below.
  environment_variables = {
    "LIVE" = "False"
    "SESSION_SECRET" = random_password.session_secret.result
  }
  reserved_concurrent_executions = 1 # Prevent denial of wallet attack
}

output "url" {
  value = module.lambda_function_with_docker_build_from_ecr.lambda_function_url

}
We build our lambda with a lambda function url which exposes your AWS Lambda function via a simple dedicated endpoint, no API Gateway or Load Balancer required. While super convenient, please understand that they are security implications when using these and so they may not be appropriate for your use case. If nothing else, set a reserved concurrency you are comfortable with to account for denial of wallet attacks.
In the environment variables, we set LIVE=false so that we don't serve the application in hot reload mode. And we also set a SESSION_SECRET which will be used for cookie encryption.
The local development story
As mentioned earlier, we will be packaging this up as a Docker image so we have two options for our local development experience. We can run the application as a Dockerfile if we want to get as close as possible to how it will be running on Lambda. Or we can just run it locally as a python script. The vscode debugging definitions below allow you to use either approach.
# .vscode/launch.json - json doesn't support comments so you'll need to delete this line
{
    "configurations": [
        {
            "type": "debugpy",
            "request": "launch",
            "name": "Debug FastHTML on Port 5001",
            "program": "${workspaceFolder}/src/main.py",
            "args": [
                "--port",
                "5001"
            ],
            "env": {
                "LIVE": "True"
            },
            "console": "integratedTerminal",
            "serverReadyAction":{
                "action": "openExternally",
                "killOnServerStop": false,
                "pattern": "Application startup complete.",
                "uriFormat": "http://localhost:5001"
            }
        },
        {
            "name": "Docker: Python - FastHTML",
            "type": "docker",
            "request": "launch",
            "preLaunchTask": "docker-run: debug",
            "python": {
                "pathMappings": [
                    {
                        "localRoot": "${workspaceFolder}/src",
                        "remoteRoot": "./"
                    }
                ],
                "projectType": "fastapi",
            },
            "dockerServerReadyAction": {
                "action": "openExternally",
                "pattern": "Application startup complete.",
                "uriFormat": "http://localhost:5001"
            }
        }
    ],
    "inputs": [
        {
            "type": "promptString",
            "id": "programPath",
            "description": "Path to the FastHTML application"
        }
    ]
}
And the supporting vscode task for the docker debug option ("Docker: Python - FastHTML") is :
# .vscode/tasks.json - json doesn't support comments so you'll need to delete this line
{
	"version": "2.0.0",
	"tasks": [
		{
			"type": "docker-build",
			"label": "docker-build",
			"platform": "python",
			"dockerBuild": {
				"tag": "cle:latest",
				"dockerfile": "${workspaceFolder}/Dockerfile",
				"context": "${workspaceFolder}",
				"pull": true
			}
		},
		{
			"type": "docker-run",
			"label": "docker-run: debug",
			"dependsOn": [
				"docker-build"
			],
			"dockerRun": {
				"env": {
					"LIVE": "True"
				},
				"volumes": [
					{
						"containerPath": "/src",
						"localPath": "${workspaceFolder}/src",
					}
				],
				"ports": [
					{
						"containerPort": 5001,
						"hostPort": 5001
					}
				]
			},
			"python": {
				"args": [
					"src.main:app",
					"--host",
					"0.0.0.0",
					"--port",
					"5001"
				],
			"file": "main.py"
			}
		}
	]
}
The most important part of this task.json is where we define the volumes and map our local source
code path to the path in the container, which, combined with our LIVE=True env var enables hot
reloading.
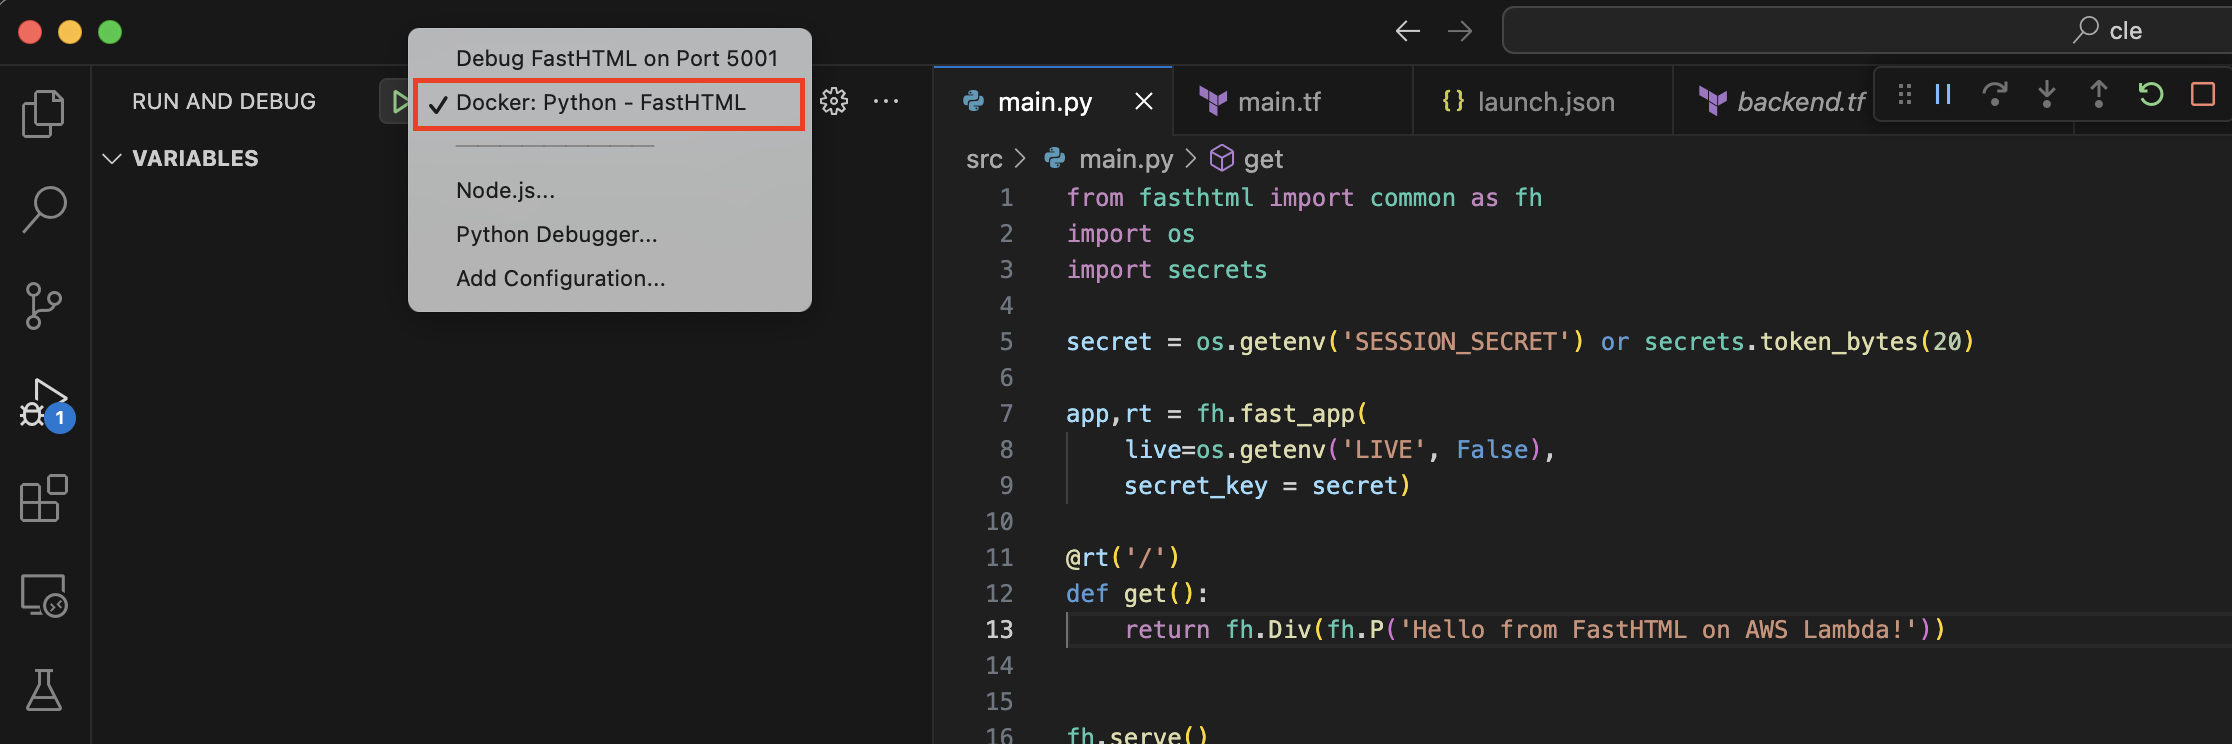
To run locally, hit F5 and it will run the application without Docker. If you'd like to run it under
Docker, change the target on the debug extension to Docker: Python - FastHTML and hit F5. Make any changes
you like in main.py and see them reflected instantly.

So back to our original goal, after testing locally, once you're ready to deploy, run terraform plan, review your plan, and then terraform apply.
You should get back your newly deployed lambda function's url. Enjoy your new FastHTML app!

Does serving a FastHTML app on AWS Lambda work beyond a HelloWorld app?
I don't know, I haven't got that far. I do plan to build something more interesting on FastHTML to see how it feels and form an actual opinion. If I do get around to doing so, I'll post a follow up.
Oh, one more thing, here's an example that shows FastHTML running on AWS Lambda with Bedrock and response streaming!
If you like the ideas of FastHTML, you might also like :
htpy pyscript puepy pyodide skulpt flet nicegui django-unicorn
And if you want options with paid tiers, anvil, reflex and solara might interest you